In this tech tip, Ocean Insight describes how careful adherence to just a few basic procedures can help to ensure reliable absorbance measurements.
Absorbance is used as a qualitative tool to identify substances or a quantitative tool to measure the concentration of a molecule in solution. With modular spectroscopy, users choose the wavelength range and resolution best suited for their measurements, and can move between setups for the lab or field. Preconfigured absorbance measurement packages are also available.
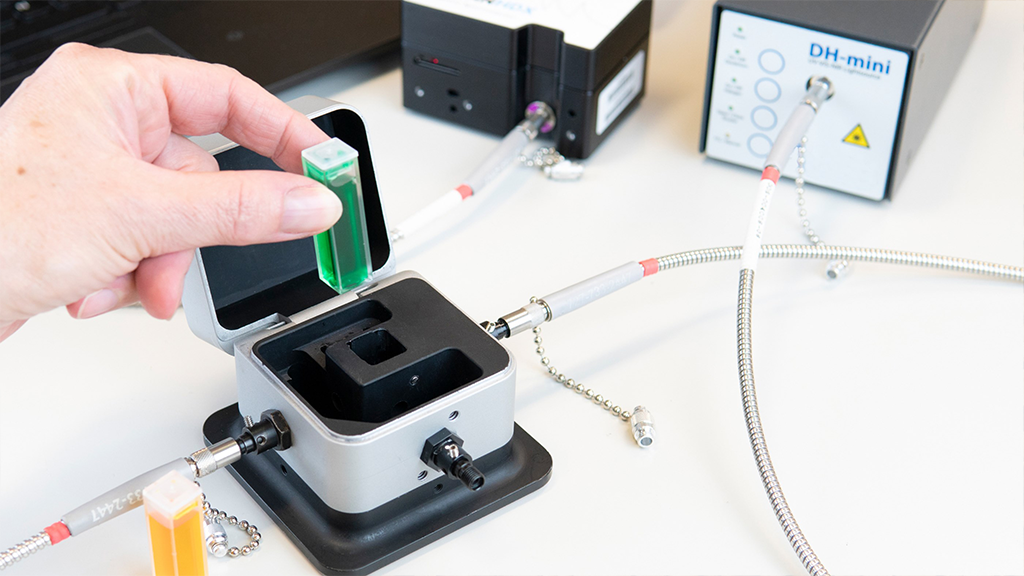
Making Measurements
Once you’ve selected your absorbance setup, follow these four procedures to ensure best results:
1. Optimize your spectrometer settings.
Set spectrometer integration time so the maximum raw signal is ~80% of full scale, and use the highest number of spectral averages tolerable. Keep boxcar width to about the same value as the pixel resolution of the spectrometer, otherwise you can affect spectral resolution.
2. Ensure an accurate reference measurement.
First, allow the light source to reach thermal equilibrium, which can take up to 30 minutes from start-up. Once the reference is acquired, view the resulting spectrum in transmission mode. If an accurate reference has been stored, transmission of the reference solution should be 100%, with some spectral noise around this value. Wavelength regions with more noise indicate the wavelengths at which the least accurate measurements will be made (typically, the shortest and longest wavelengths, or “edges” of the spectrum).
3. Make an effective dark measurement.
When taking a dark measurement, block the light at the light source. Turning the light source off and on again will affect its thermal equilibrium and require a new reference measurement. Alternatively, many cuvette holders have a filter slot where the light can be blocked. Use a piece of metal or object that is 100% opaque. Paper, even cardboard, can be deceptively transmitting, and it takes only a very low level of light to affect a measurement.
4. Prevent contamination of your sampling setup.
Ensure that all surfaces of the cuvette are clean and clear of fingerprints, dust and dirt. Fill the cuvette with the solvent or buffer solution to be used for the sample, and check for bubbles. Also, be mindful of checking for bubbles when using a transmission dip probe or flow cell, as these devices are prone to errors from bubbles, especially at shorter pathlengths.